Showing posts with label vinyl. Show all posts

Monday, August 30, 2024

Crafter's Square vinyl at Dollar Tree!


I was shopping at one of my area Dollar Trees the other day and saw a shelf full of Crafter's Square vinyl!  So, I bought one of each color, which at that store was black, white, red, blue, yellow and green and in glitter vinyl there was silver, gold and rose gold.  If you follow my facebook page you would have seen a live review I did using both the regular and glitter vinyl.  Be sure to check out the Facebook page to see that review.

The book I put the vinyl on was handed off to my granddaughter.  So far, with the exception of some picking attempts, the vinyl is holding up.  Would I use this on a tumbler or mug that I wanted to last more than a few weeks?  No.  But if you are making a shadow box and placing vinyl on the glass, this would work.  Or if you are wanting to put vinyl on birthday treat bags.  12" wide by 48" long is a lot of material for $1.  Well worth it, I would say.

See, making beautiful things can be affordable!


Tuesday, May 11, 2024

Mother's Day/Wedding Gift

Dollar Tree potholders and white vinyl from Stahls.  Split monogram from Caluya Designs on Etsy. Pressed with Cricut Easypress.


Wednesday, October 4, 2017

October Update!

Although I've been quiet on here, I have been pretty busy with a few projects.  They range from birthday t-shirts, to Halloween wreaths!  I thought I would take a few minutes to share them with you.

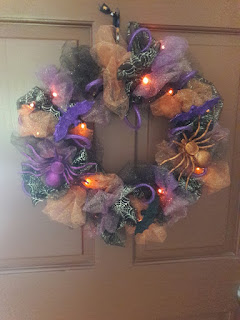
Made using the Crafters Corner sparkle tulle from Dollar Tree along with bats and spiders.  Lights were from my stash purchased 3 years ago at Hobby Lobby.

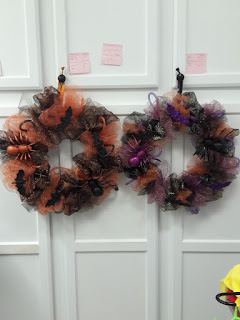
 Made with Dollar Tree sparkle tulle, bats spiders and led lights.

 I spent a day running around to several Dollar Tree stores in my area looking for the sparkle tulle, and the metal wreath rings to make these.  After watching a YouTube tutorial and seeing how easy it was, I wanted to make one for myself.  It's the top picture.  I then made one for my daughter and a son.  I was able to make these for a cost of about $10 each.  And they all have led lights.  It was fun, but very messy.  I have glitter everywhere.  The video is from 2016, and I didn't find the Halloween mesh, so I used the tulle.  I still love the way it turned out.

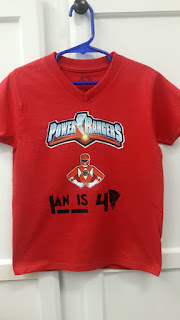
 Made using 3G jet-Opaque for the logo and Red Ranger, and black htv vinyl for the name.
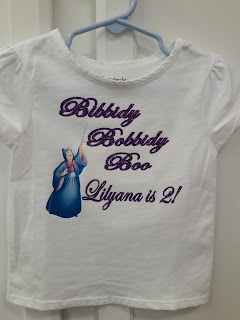
Made using the 3G Jet-Opaque for the Godmother and glitter htv for the saying.

I have also been designing and making t-shirts for birthdays.  I made one for my grandson's #2, (not pictured) and one for the son of a friend.  The "Cinderella" themed shirt is for my granddaughter.  I will also be making the svgcuts pumpkin carriage for a center piece.  I have made additional shirts for the grand kids, but I don't always think to take a picture before they are "worn away"!

In the mean time my massive paper collection is sitting idle wondering when I will start using it again, while my heat transfer vinyl collection is growing.  But I have my papers picked for the coach and I'll be cutting and gluing it this weekend. 

Thanks for stopping by!


Thursday, August 17, 2017

Eclipse crazy!

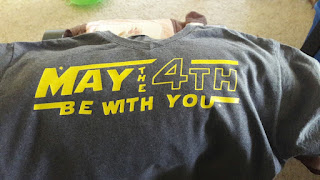
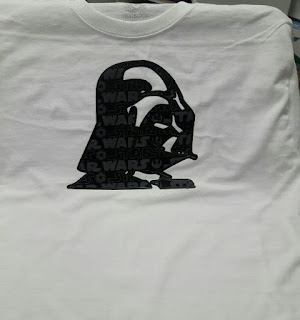
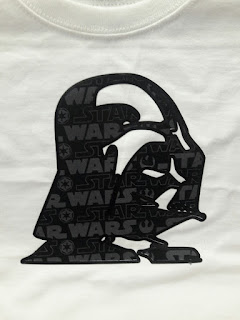
 I've been gearing up for a trip north to be part of the 2017 Solar Eclipse.  We're going to a town that will experience totality.   We have our glasses for viewing and I just had to make the grandkids some shirts!  I had a lot of fun designing them.   The older boys wanted the Star Wars themed shirts.
 These were made with a yellow metallic and black htv.
 
 This little shirt was made with black and glow in the dark htv.
This shirt was made using vinyl adhedive and deco foil. 
And finally we have glitter htv and glow in the dark .  

This was a fun and fairly quick project using my Sizzix eclips 2 and my 15x15 heat press.   


Wednesday, May 3, 2017

Teacher Appreciation 2017

Can you believe it?   It's already May!   Are you scrambling for a last minute teacher appreciation gift?  I got the Oracal 651 out and sat down with ecal 2 and made this design for some of the teachers in our life.  I admit,  I had some trouble and had to remove,  re-cut and then reapply my design on a couple of these,  but FINALLY I got the look I was shooting for.
I finished them with some paper and foil shred.  If you make some using the Dollar Tree tumblers, be sure to include a note to handwash only.   Have fun creating!

Wednesday, April 26, 2017

Crazy about HTV!

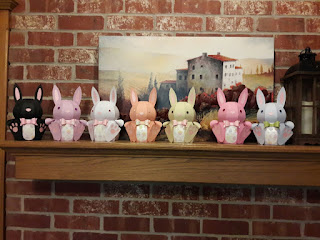
I've been very busy with little people this last year and a half.  But now that they are getting older and can entertain themselves for little bits of time, I find more crafting time.  I completed bunnies for Easter that I cut out last year but didn't have time to put together.  I was even able to cut a couple more for new babies.

This has been a very busy file for me.  I think I can safely say I've made more that 50 of these cute little guys!

But more recently, I've been hearing the call of vinyl.  It is a medium I have really wanted to learn more about.  I had ordered some heat transfer vinyl a couple of months ago, but didn't have the courage to try it.  I then decided I needed a heat press and so I bought myself a 15 x 15 clamshell from eBay.  Man, does it make this vinyl more fun to do!  I've tried my hands at a couple of projects, both with HTV and adhesive.  I've used the adhesive before, but with some improvements on the ecal 2 software, I think my projects are looking even better.  Here are the ones I've done over this last week.
 This was my first htv project.  I cut the vinyl too deep and had to piece it all together on the shirt.  Not really the result I wanted, but a lesson learned.
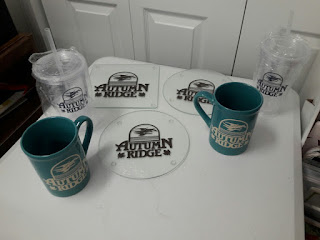
 I bought a bunch of these glass cutting boards/trivets at the Dollar Tree over a year ago, with the intent to etch or put vinyl on them for gifts.  I finally got a couple done along with my Dollar Tree tumblers and yes, these are Dollar Tree mugs.  I'll give these away in a drawing for our neighborhood work day this Saturday.


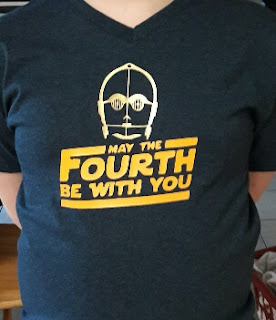
I tried my hand again at a different style Star Wars day shirt.  I had better results, by not cutting all the way thru the htv.  I think I need to work on sizing now.
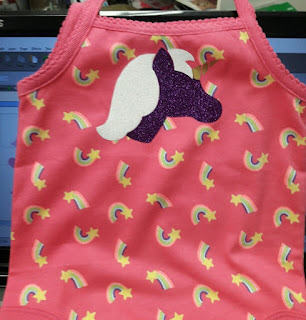
Now when I go to Wal-Mart, I'm on the look out for cheap apparel to add htv too.  I thought a unicorn was just what this little summer romper needed.  I'm getting better!

My last project today was inspired by some clearance fabric I found at Wal-mart.  I watched a tutorial on Cuttin Corners vinyl on applying heat bond ultra to fabric to make it like htv.  I then made a shadow cutout in black vinyl to edge it.  My placement was a little off.  I'm going to need better lighting by my heat press.  But I do love the look.  Now to see how long it will actually last!

Be sure to check out Betsy at Cuttin Corners vinyl, or the folks at Expression vinyl for great tutorials and ideas for using vinyl.  

Thanks for stopping by!

Sunday, April 5, 2015

30 Day Challenge, Day 5 Happy Easter!

Today's post are projects I actually made last night in anticipation of not having time to craft today.

I used my Sizzix eclips2 to cut vinyl for these two tumblers that are bithday gifts later this week.  Both vinyls are oracal 651 that I purchased off ebay two years ago.  I was afraid to use it until now!  After watching a few youtube videos on how to apply it I have been less hesitant.  I'm very pleased with the outcome of these tumblers.  I bought a case of double wall tumblers from Dollar Tree.  This case had the summer colors.  It has the red and blue you see and a really nice green and orange.  I found the images on the internet under free svg searches and then did a trace into ecal2.  I love the wrapper feature!  It curves the words and design so your cup looks more professional.


 I have found for transferring the design from the mat to the project is really easy with some Dollar Tree Clear Magic Cover.  It's clear shelf paper that has just the right amount of sticky to make the transfer and you can see what you're doing.  

Thanks for stopping by and be sure to check out my facebook page.  I will be having a spring theme give away because we got to 200 page likes!

Wednesday, March 25, 2015

April Personal Challenge

I have been very busy since the craft show making bunnies for Easter.  The total tally is 40!  But now I'm ready to move on.  I have decided to do a 30 personal challenge.  I'm going to make a new item each day for the month of April.  I will showcase each new project here and on my facebook page.  So, be sure to check in often and see what's crafting!

Monday, November 17, 2014

Crafting On A Budget-Making Something Personal

Christmas is getting closer!  Radio stations are playing Christmas music and the stores have been full of Christmas decorations for weeks!  My mind has been filled with Christmas projects as well!  But not every project is planned entirely of paper.  I know!  That's not what my name would suggest!  I do like to stray off the paper path every once in a while, just for something different to do.  This Christmas I have plans to add vinyl to the very popular plastic tumblers that everyone seems to carry around.

I made this one as a test to see how difficult it would be for me.  Working with the vinyl is a little challenging, but with more practice it will be easy.  This tumbler is from the Dollar Tree.  I bought the Oracal vinyl on ebay last year, but I'm just now getting around to using it.  I went ahead and ordered a case of the tumblers from Dollar Tree direct, so I wouldn't have a problem getting the number I needed.  Popular items can be hard to locate there, when you really want them!   These should be super cute and I'm sure the "giftees" will really enjoy them!

I watched a YouTube video made by Christopher Alan Designs on how to apply the vinyl.  Very helpful presentation.  I already had some clear transfer tape from my very first attempt at vinyl several years ago, but when I came across the Magic Cover clear contact paper he talks about, I bought 10 rolls! (at the Dollar Tree of course!)

For another project, I wanted to get more use from my Epiphany Crafts Shape Studio tools.  (I have acquired several of the shapes)  They were having a sale on Joann.com for the charms that go with the various shape studio tools.  

So, I bought some to go with my tools.  But...I wasn't sure what to do with them.  On another shopping trip to Michaels, I came across some bracelets that were only $2.49 each on sale.  They are made with the stretchy cord and had at least one dangle hanging off of them.  Light-bulb!  Take off the dangle they had and replace it with a charm!  Here is one of the bracelets I changed.


I also found some packages of heart charms and word charms that I added to this one.  I like the way it turned out and for such a budget price!  (less than $5.00)  

Another project I did recently (sorry I forgot to take pictures of it) for a guy was to take some pictures of a mutual relative (it was for the other grandfather) and make little "tool box" magnets from the epoxy shapes.  I also made the My Day with Dad toolbox to put them in.  I did change the tag from dad to the recipients name.  Another personal project that packs a big punch for such a budget price!

Just wanted to share these few easy, budget friendly projects to show that it doesn't cost a lot to show someone you care.  Just a little bit of your time to make it special!

Thanks for stopping by!  Be sure to like me on Facebook!
Older Posts Home

Have You Been Missing Out?

Below are the fun giveaways that have be going out the last few weeks.  Only 2 more Wednesdays until Christmas!  That means only 2 more give...