Showing posts with label paper crafts on a budget. Show all posts

Thursday, July 1, 2024

Making A Plan For A Make-it Christmas


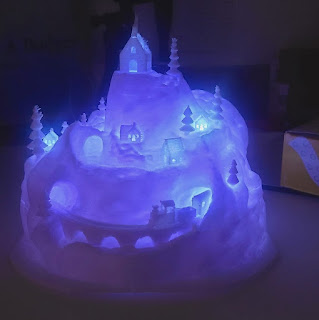
 2020 was something else.  As the pandemic raged on, I decided to make most of the gifts I was going to give for Christmas.  It was a well recieved idea.  I did some sewing, and some 3D printing, and I was able to give some thougtful, handmade gifts.  I started printing the 3D projects in September, because I knew they would take a long time to make.  I printed lithophane lightboxes for all the younger grandkids, and a couple for some adults.  I also sewed the younger grandkids a set of pajamas, or a gown. 

 This year,  I want to continue what I hope will become a yearly tradition, and again have a Make-it Christmas.  So, now is the time to start planning what a Make-it Christmas will look like.  My first step is to take inventory of all that I have and utilize as much of it as I can.  This is also a good time to stock up on items that aren't in high demand, like flannel and fleece.  For 3D printing, knowing how much filament you might need for your projects could save you time and money now.  Starting in October, the demand for lithophanes will become very high, and good quality, white filament will be hard to source.  


A lot of paper crafters start making their Christmas cards now and several of the more popular SVG sites will put out a bundle for them.  As of this writing, there are 177 days until Christmas.  That's 25 weeks or 6 months.  For those of us who are chronic procrastinators, this seems like an eternity.  But, as one who usually falls short on a dozen different projects I was going to get done for Christmas, that isn't enough time!  

What's my plan?  I'm going to make out my gift list, (get the link here) and start planning what I want to give to each person.  Then I'm going to plan to make one gift each week for the next 25 weeks.  That should give me plenty of time to find all the supplies I already purchased, but don't remember where I put them.  I might even have time to actually make a few cards this year!  Wish me luck!  I'll make a blog post each time I complete a Christmas gift. (but I won't be able to post picture)  Hopefully, this won't be the last post!  🤣
Wednesday, April 26, 2017

Crazy about HTV!

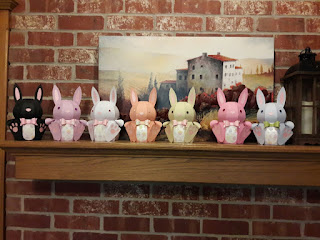
I've been very busy with little people this last year and a half.  But now that they are getting older and can entertain themselves for little bits of time, I find more crafting time.  I completed bunnies for Easter that I cut out last year but didn't have time to put together.  I was even able to cut a couple more for new babies.

This has been a very busy file for me.  I think I can safely say I've made more that 50 of these cute little guys!

But more recently, I've been hearing the call of vinyl.  It is a medium I have really wanted to learn more about.  I had ordered some heat transfer vinyl a couple of months ago, but didn't have the courage to try it.  I then decided I needed a heat press and so I bought myself a 15 x 15 clamshell from eBay.  Man, does it make this vinyl more fun to do!  I've tried my hands at a couple of projects, both with HTV and adhesive.  I've used the adhesive before, but with some improvements on the ecal 2 software, I think my projects are looking even better.  Here are the ones I've done over this last week.
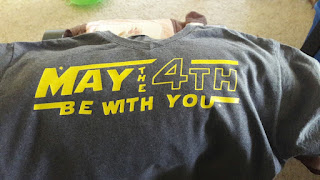
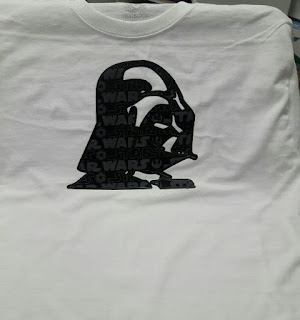
 This was my first htv project.  I cut the vinyl too deep and had to piece it all together on the shirt.  Not really the result I wanted, but a lesson learned.
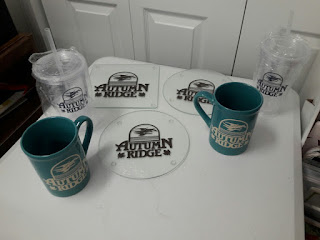
 I bought a bunch of these glass cutting boards/trivets at the Dollar Tree over a year ago, with the intent to etch or put vinyl on them for gifts.  I finally got a couple done along with my Dollar Tree tumblers and yes, these are Dollar Tree mugs.  I'll give these away in a drawing for our neighborhood work day this Saturday.


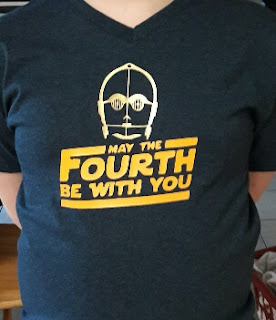
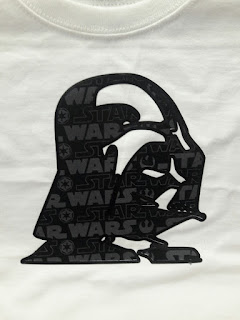
I tried my hand again at a different style Star Wars day shirt.  I had better results, by not cutting all the way thru the htv.  I think I need to work on sizing now.
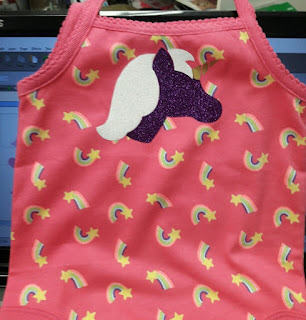
Now when I go to Wal-Mart, I'm on the look out for cheap apparel to add htv too.  I thought a unicorn was just what this little summer romper needed.  I'm getting better!

My last project today was inspired by some clearance fabric I found at Wal-mart.  I watched a tutorial on Cuttin Corners vinyl on applying heat bond ultra to fabric to make it like htv.  I then made a shadow cutout in black vinyl to edge it.  My placement was a little off.  I'm going to need better lighting by my heat press.  But I do love the look.  Now to see how long it will actually last!

Be sure to check out Betsy at Cuttin Corners vinyl, or the folks at Expression vinyl for great tutorials and ideas for using vinyl.  

Thanks for stopping by!

Friday, February 26, 2016

Cut Once and Craft for a Week.


With the addition of two grandchildren, my crafting time has been drastically reduced.  I get an hour here and there to put a small project together, but not the real craft time I desire.  In a effort to get more projects done, I decided to borrow an idea from some busy mom blogs.  "Cook once, eat all week."  So this week, I am cutting once to craft all week!

                                    
                                                         (previous years projects)

  The Bunny Hop kit by SVG Cuts from a few years ago, has one of my favorite projects for Easter.  I love the Bunny box!  I made all the grandkids one several years ago, but with new family members, everyone is getting a new bunny.  I have papers picked and I'm cutting out 8 bunnies to put together this week.  It's the setup process that takes me the longest.  Although this project is easy to pick paper for, cutting and weeding still take a while to do.  It seems I can be in my craftroom, unbothered, for several hours on Friday nights!  I have two more bunnies to cut out, so I shall get back to it!

Tuesday, February 23, 2016

Free SVG Files!

Have you been to the Dreaming Tree website yet?  If not, get over there fast!  They have several totally free svg files to download.  And right now, they will give you a gift card worth $2.99 to their website, just for making one of the free SVG files!  How crazy is that?!?!  But that's not all....if they get to 15,000 facebook likes before the promo ends, they will have a cutting machine give away.  To enter, you just have to make the free file and enter to receive the gift card!  So, here is the link to get the free file (Click here).  And here is the link to enter once you make the Clover Treat basket (Click here).  Be sure to go to their facebook page and give them a like!  The sooner they get to 15,000, the closer we'll all be to winning ! 


Friday, February 12, 2016

It's Been A While

Someone may be wondering where I disappeared to, so I thought I would take a minute and update by blog.  In September,  a new grandson was born.  Then in October, and new granddaughter was born.  I watch the grandson and his sister (who turns three in a few days) Monday through Friday and I watch the new granddaughter about 2 Saturdays each month.  That doesn't leave much time or energy for crafting these days.  I do manage to sneak in an item or two here and there.  I did make a free file from Dreaming Tree for preschool teachers.


It was quick and very easy, but looks so nice!  The papers are from my stash.  I got them several years ago.  Makingmemories Je t'adore.  And foil paper I found by chance at the Dollar Tree.   It's called Do It Yourself Projects Holographic and Foil Sheets by Jot.  It came with 20 sheets of varying colors.  I was shocked.  It cut very nicely.  The trim around the bottom was from Micheals.  It's called Fabulous Finds Adhesive Trim.  It's a really fun touch that looks so sparkly.  

I hope to get a rhythm back for more crafting soon.  

Thanks for stopping by!

Wednesday, April 1, 2015

Day 1 of the 30 Day Personal Challenge!

For my first day of the 30 day personal challenge I have completed the beer mug from the Feeling Lucky kit by SVG Cuts.

Feeling Lucky by SVG Cuts

This was suprisingly easy and very fast to put together!  Another one for my favorites list!  

To put this together I used AC Cardstock for the base and The Guy Stack by DCWV for the panels.  I embossed the white panels with a Cricut Cuddlebug folder I've had for a long time.  (I will be on the lookout for a more sudsy one though!)  This is a great example of how versitile the kits are at SVG Cuts.  

As I continue my challenge, I will use it as an opportunity to stockpile some gifts and cards that I will need in the very near future.  I'm terrible about starting on projects at the very last minute, or not getting them started at all.  I hope this challenge will help me do a better job of planning and executing!  

While you're here, be sure to stop by my Facebook page and give it a like!  When I get 200 page likes, I'll have a spring theme give away!

Thanks for stopping by.  Be sure to stop by often (or daily) and see what else I have going on in the craft studio!

Monday, February 9, 2015

First Craft Show is Done!

Well,  I made it.  Got to my first craft show and actually sold a few things!  Unfortunately for the vendors and crafters,  Wichita had a February temp of high 68 so the traffic was a little light.  Most people chose to spend the day in the great outdoors on such a glorious day.  We've had some really cold temps, so I don't blame them!  I met some really nice people and bought some wonderful jams from Steve's Jams and Jellies.  I opened the Cherry Cheesecake right away to try it.  It really taste like Cherry Cheesecake!

Ok, back to my experience.

We could choose to set up either Friday evening, or Saturday morning.  I chose Saturday morning, so I could do a mock set up at home first.  (I also had to finish up pricing and packing my items)  I got up just before 6am, took my shower, loaded my car and drove over to pick up my niece, who was helping me.  We arrived right at 8 am and got busy setting up.  We were done by 9 and I am very pleased with how our booth turned out.

 One of the things my family highly suggested was for me to take the Easter bunnies from last year and see if anyone wanted to order them.  That was the best idea of all!  I ended up with orders for 10 bunnies!
 Here is a look at the bunnies from last year!  

All in all, I am very pleased with my first attempt at craft showing.  I'll be keeping a look out for another small craft show for the future.  In the mean time, I have some bunnies to make!

Be sure to visit my Facebook page and give it a like!

Wednesday, December 17, 2014

Wonderful Gift From SVG Cuts!

If you have an electronic cutting machine, (i.e. a cricut, cameo, eclips, brother) then you need to click on the link below and get your absolutely free Santa's Sweets SVG kit from SVG Cuts.  It's their way of wishing everyone a Merry Christmas and Happy New Year.


Santa's Sweets Kit, Free for a limited time!

Even if you don't have a cutting machine yet, and plan to get one after the first or as a gift, this is the time to get this free gift to get you started!  You'll fall in love!

Monday, November 17, 2014

Crafting On A Budget-Making Something Personal

Christmas is getting closer!  Radio stations are playing Christmas music and the stores have been full of Christmas decorations for weeks!  My mind has been filled with Christmas projects as well!  But not every project is planned entirely of paper.  I know!  That's not what my name would suggest!  I do like to stray off the paper path every once in a while, just for something different to do.  This Christmas I have plans to add vinyl to the very popular plastic tumblers that everyone seems to carry around.

I made this one as a test to see how difficult it would be for me.  Working with the vinyl is a little challenging, but with more practice it will be easy.  This tumbler is from the Dollar Tree.  I bought the Oracal vinyl on ebay last year, but I'm just now getting around to using it.  I went ahead and ordered a case of the tumblers from Dollar Tree direct, so I wouldn't have a problem getting the number I needed.  Popular items can be hard to locate there, when you really want them!   These should be super cute and I'm sure the "giftees" will really enjoy them!

I watched a YouTube video made by Christopher Alan Designs on how to apply the vinyl.  Very helpful presentation.  I already had some clear transfer tape from my very first attempt at vinyl several years ago, but when I came across the Magic Cover clear contact paper he talks about, I bought 10 rolls! (at the Dollar Tree of course!)

For another project, I wanted to get more use from my Epiphany Crafts Shape Studio tools.  (I have acquired several of the shapes)  They were having a sale on Joann.com for the charms that go with the various shape studio tools.  

So, I bought some to go with my tools.  But...I wasn't sure what to do with them.  On another shopping trip to Michaels, I came across some bracelets that were only $2.49 each on sale.  They are made with the stretchy cord and had at least one dangle hanging off of them.  Light-bulb!  Take off the dangle they had and replace it with a charm!  Here is one of the bracelets I changed.


I also found some packages of heart charms and word charms that I added to this one.  I like the way it turned out and for such a budget price!  (less than $5.00)  

Another project I did recently (sorry I forgot to take pictures of it) for a guy was to take some pictures of a mutual relative (it was for the other grandfather) and make little "tool box" magnets from the epoxy shapes.  I also made the My Day with Dad toolbox to put them in.  I did change the tag from dad to the recipients name.  Another personal project that packs a big punch for such a budget price!

Just wanted to share these few easy, budget friendly projects to show that it doesn't cost a lot to show someone you care.  Just a little bit of your time to make it special!

Thanks for stopping by!  Be sure to like me on Facebook!

Tuesday, November 4, 2014

Crafting On A Budget-Dollar Tree Pre-Christmas Haul 11-4-2014

Hello Everyone.

I went to my local Dollar Tree today to stock up on essentials (face tissue, paper towels, baggies, bread).  I always cruise the other isles, because you just never know.  Today I made some fabulous finds, both for crafting and for gift giving!  Here they are!


On the counter are, Skylanders fun tape, burlap ribbon, laser tap,  some adorable compacts, a sweet Disney pen and pad set, and Christmas ribbon!  

They were stocking some really nice looking pics and floral things too!  I had to stop myself!
I love finding the compacts.  They go inside the Luxury Handbags from SVG Cuts nicely for a little extra special something.  These will be great for the younger gals.

I hunted at both Hobby Lobby and Michaels last week for Christmas ribbon for the Classic Christmas Advent Calendar from SVG Cuts.  I was only able to find the 2" wide ribbon or the 3/8" wide.  The ribbon I found at Dollar Tree was 5/8", which fits around the calendar better.  The 3/8" ribbon works, but the thicker ribbon helps hide any little imperfections.  
Not as many choices, but I'm not unhappy about the selection.

I'm also expecting a case of the plastic tumblers to personalize with some vinyl that I have been ignoring for a year!  Can't wait!  This is going to be a craf-tabulous Christmas for me!

Be sure to check out my Facebook page and "like" it.  I have a monthly give away. 


Tuesday, September 23, 2014

It's Official! Fall is Here!

Today is the official first full day of Fall.  It arrived at 9:29 p.m. last night, according to the Old Farmers Almanac.

In an effort to stay ahead of special days and holidays that I like to give gifts for, I made these baskets about 2 weeks ago.  Last night I made the easiest pumpkin muffin recipe.  I baked them in the really big muffin tin so each basket just got one.  I put some paper shred in the bottom of each basket, stacked the muffin on top and added a book of stickers (that I keep on hand from the Dollar Tree). The boys took them to school today to give to their teachers.  I realize that it's not a traditional gift giving day, but I enjoy making my paper crafts, and it's even more enjoyable to have an occasion for creating and giving!

The basket is from SVG Cuts Fall Harvest kit from two years ago.  Most of the papers I used were single color AC card stock.  This was a quick and easy project to complete.  The baskets are roomy allowing for one big item or several small ones.  I hope the teachers like them as much as I did making them.  Now on to more Halloween crafts!

Be sure to visit my Facebook page for a chance for TWO giveaways!

Thanks for stopping by!  Craft Happy!

Thursday, September 18, 2014

Crafting on a Budget, and Making It Look Great!

This was a fun project to make.  It takes a lot of  paper, but it's super cute and fun to have out for Halloween.   But a project like this can really exhaust your crafting resources. and put a crimp in your craft budget.  I'm going to share a couple of tricks I used to help keep this beauty below budget.

1.  Use tissue paper instead of Velum.  Velum can cost over a dollar per sheet.  I can get an entire package of tissue paper at the Dollar Tree, for just a dollar!  I can't cut it on my machine, but it's not hard to hand cut the pieces.

2.  If your decorative panels are of a heavy, sturdy card stock, use lighter cheaper paper for the base.  It won't have the sturdiness you would get from a project made of all AC card stock, but no ones going to be living in it.  However,  if the decorative panels are of a cute paper, and not card stock, don't scrimp.  (On the roof I used a sturdy purple card stock and some cute Halloween paper I bought a couple of years ago at Michaels.)

3.  Skip additional embellishments.  This house has so much fabulous detail, it doesn't need any embellishment.  On the trim pieces I just inked and embossed.

4.  Mary at SVG Cuts, put a lot of thought into this project and included lining for the interior to finish if off nicely.  That's a wonderful touch, but I saved myself four pieces of paper by leaving them off.

5.  Don't go cheap on glue.  It is what holds your project together.  I like the quick drying glue from 3M.  Even though they changed the bottle and perhaps the formula, I still haven't found any I like better.  It doesn't make the paper wet like some glue does. It doesn't require much to get the job done. And once it's set, it is set!  (I buy it at Micheal's with a 40% off coupon)

6.  I buy most of my "holiday" papers after the holiday, when it's being cleared out.  So, yes, a lot of the projects I make are with last season's paper, or even several years ago.  But who really knows or cares.  I can get more bang for my buck by shopping clearance sales!

I realize that my tips will not change the course of crafting, but perhaps it will help a few of my fellow crafters enjoy more affordable crafting.  If you have a money saving tip, why not share?

Thanks for reading and craft happy!


Friday, August 22, 2014

Giving something back better than you received it!

One of my grandsons was receiving tutoring over the summer, and the teacher sent a deck of vocab game cards home with us for further practice.  She asked us to return them when school started, so I thought it would be nice to dress them up a little and add a few tokens of appreciation.  I have been wanting to make the backpack from SVG Cuts Back to the Books kit, so I thought this would be a great way to tackle two issues.  1.  Returning the cards in better condition than we received them, and  2.  Making the backpack.

I put the cards and a couple of note pads, and sticker sheets into this little darling and sent it off with my grandson this morning.  I'm sure she loved it! 

As a side note:
I used 2 12x12 sheets of AC solid color card stock for the back pack.  One sheet of DCWV premium stack called The Grade School stack. The pocket on front was made from scraps.  The dot sheet from the Grade School stack, and the main pocket piece was from Making Memories Dilly Dally collection.  The button and letters are from Doodlebug Designs and the twine was from the bargain bin at Michael s.  I did ink the edges of the pocket and the panel.  I think I got is cut and assembled in about an hour.  Super easy.  Super cute!  

To keep my crafting costs down, I buy all of my paper stacks when they are on sale for 40-50% off.  I try not to buy online unless I'm getting free shipping.  I use to find great deals at Oh My Crafts, but they have gone out of business.  I now find a lot of great deals at JoAnn.com.  That is where I buy my AC card stock when it's half off.  And right now...
 10% off your total purchase + Free Shipping w/ $60 purchase*. Code DBLUP235 

Thank you for stopping by.  Please visit my Facebook page and give me a like!

All projects are cut using the Sizzix eclips version 1.

Thursday, August 14, 2014

Crafting on a Budget.

Paper projects are fun to make, but paper can be expensive.  I have found some ways to make my paper pads go a little farther so I make sure to get my money's worth.  It helps me afford the svg kits I love to buy from SVG Cuts.  I would like to share some of my tips with you, so that you too can enjoy more crafting on a budget.

Today I'm sharing my love for The Dollar Tree!

I have found so many things at the Dollar Tree that I can use in my crafting.  And for $1 it is usually a savings over the craft stores or even Wal-Mart.  I did some shopping there this week for the first day of school teacher gifts I'm sending with the boys.  I bought some little note pads, pens and sticky notes.  With these few items, I'll fill up a desk set and it will be adorable, useful and cheap!  And each purchase will make more than one gift.

In the front is a pad of sticky notes.  I get one package of 5 and split them out.  The pens came 3 to a package.  Next are the cards that I made.  Behind the cards and their envelopes are two little lined note pads.  There are 5 pads in one package.  The last item is a really nice set of sticky notes that have standard size notes and little "flag" type notes.  I left them intact since they were just a $1!  To keep from using two pieces of the decorative card stock on the desk set, I cut the bottom piece from the same card stock as the green piece on top.  I was able to use the entire 12x12 sheet.  So, for these two sets, instead of using 5-6 sheets of card stock, I only used 3 sheets.  The apple is one, the one with the writing is two and the green for the border piece and bottom was three!  Even on the cards, I changed the size a little so I could cut two card bases from one piece of 8 1/2 x 11 card stock, instead of a 12x12.  I also save by using the thinner paper from the large paper pads for decorative panels.  

This is just one example of ways you can save on supplies and add-ons to keep gift items within budget.  I'll share more money saving tips in the future and would love to hear how you save too!


Be sure to visit my Facebook page and give me a like!  Thanks for stopping by! 


Older Posts Home

Have You Been Missing Out?

Below are the fun giveaways that have be going out the last few weeks.  Only 2 more Wednesdays until Christmas!  That means only 2 more give...