Showing posts with label handmade. Show all posts

Tuesday, May 11, 2024

Spring Is Here


These lovely birdhouses are just a couple of the many 3d svg designs you'll find at Dreaming Tree.  With a few fun touches, like little birds and moss from the Dollar Tree and even a few of the silk flowers they have, you can have a beautiful gift for a friend or neighbor, or put a touch of sping in your home decor.


Wednesday, October 4, 2017

October Update!

Although I've been quiet on here, I have been pretty busy with a few projects.  They range from birthday t-shirts, to Halloween wreaths!  I thought I would take a few minutes to share them with you.

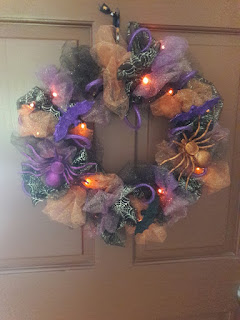
Made using the Crafters Corner sparkle tulle from Dollar Tree along with bats and spiders.  Lights were from my stash purchased 3 years ago at Hobby Lobby.

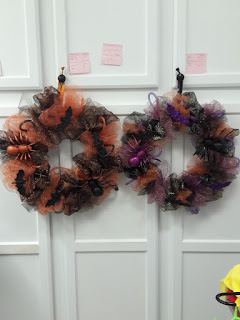
 Made with Dollar Tree sparkle tulle, bats spiders and led lights.

 I spent a day running around to several Dollar Tree stores in my area looking for the sparkle tulle, and the metal wreath rings to make these.  After watching a YouTube tutorial and seeing how easy it was, I wanted to make one for myself.  It's the top picture.  I then made one for my daughter and a son.  I was able to make these for a cost of about $10 each.  And they all have led lights.  It was fun, but very messy.  I have glitter everywhere.  The video is from 2016, and I didn't find the Halloween mesh, so I used the tulle.  I still love the way it turned out.

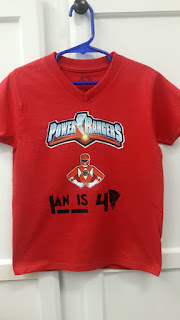
 Made using 3G jet-Opaque for the logo and Red Ranger, and black htv vinyl for the name.
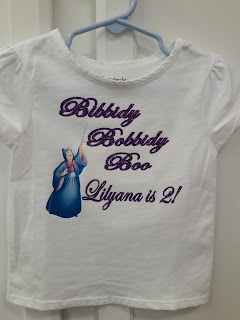
Made using the 3G Jet-Opaque for the Godmother and glitter htv for the saying.

I have also been designing and making t-shirts for birthdays.  I made one for my grandson's #2, (not pictured) and one for the son of a friend.  The "Cinderella" themed shirt is for my granddaughter.  I will also be making the svgcuts pumpkin carriage for a center piece.  I have made additional shirts for the grand kids, but I don't always think to take a picture before they are "worn away"!

In the mean time my massive paper collection is sitting idle wondering when I will start using it again, while my heat transfer vinyl collection is growing.  But I have my papers picked for the coach and I'll be cutting and gluing it this weekend. 

Thanks for stopping by!


Wednesday, May 3, 2017

Teacher Appreciation 2017

Can you believe it?   It's already May!   Are you scrambling for a last minute teacher appreciation gift?  I got the Oracal 651 out and sat down with ecal 2 and made this design for some of the teachers in our life.  I admit,  I had some trouble and had to remove,  re-cut and then reapply my design on a couple of these,  but FINALLY I got the look I was shooting for.
I finished them with some paper and foil shred.  If you make some using the Dollar Tree tumblers, be sure to include a note to handwash only.   Have fun creating!

Wednesday, April 26, 2017

Crazy about HTV!

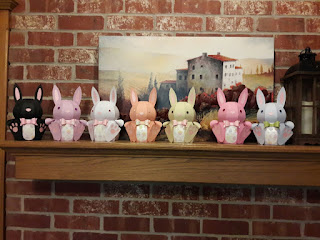
I've been very busy with little people this last year and a half.  But now that they are getting older and can entertain themselves for little bits of time, I find more crafting time.  I completed bunnies for Easter that I cut out last year but didn't have time to put together.  I was even able to cut a couple more for new babies.

This has been a very busy file for me.  I think I can safely say I've made more that 50 of these cute little guys!

But more recently, I've been hearing the call of vinyl.  It is a medium I have really wanted to learn more about.  I had ordered some heat transfer vinyl a couple of months ago, but didn't have the courage to try it.  I then decided I needed a heat press and so I bought myself a 15 x 15 clamshell from eBay.  Man, does it make this vinyl more fun to do!  I've tried my hands at a couple of projects, both with HTV and adhesive.  I've used the adhesive before, but with some improvements on the ecal 2 software, I think my projects are looking even better.  Here are the ones I've done over this last week.
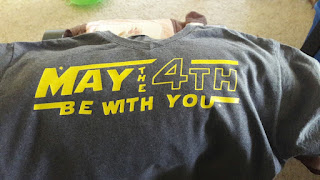
 This was my first htv project.  I cut the vinyl too deep and had to piece it all together on the shirt.  Not really the result I wanted, but a lesson learned.
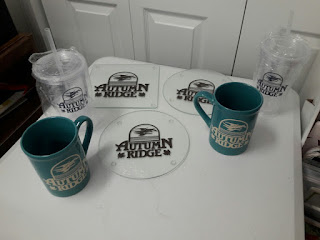
 I bought a bunch of these glass cutting boards/trivets at the Dollar Tree over a year ago, with the intent to etch or put vinyl on them for gifts.  I finally got a couple done along with my Dollar Tree tumblers and yes, these are Dollar Tree mugs.  I'll give these away in a drawing for our neighborhood work day this Saturday.


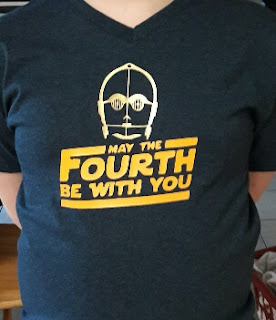
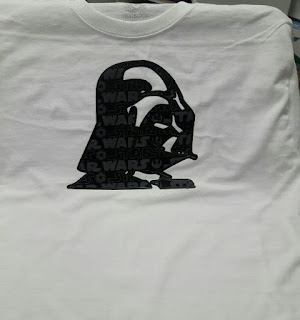
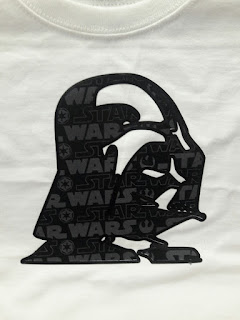
I tried my hand again at a different style Star Wars day shirt.  I had better results, by not cutting all the way thru the htv.  I think I need to work on sizing now.
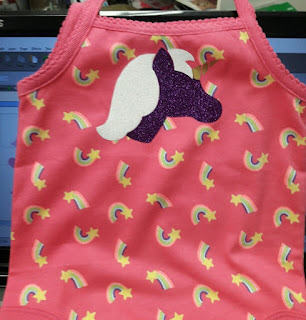
Now when I go to Wal-Mart, I'm on the look out for cheap apparel to add htv too.  I thought a unicorn was just what this little summer romper needed.  I'm getting better!

My last project today was inspired by some clearance fabric I found at Wal-mart.  I watched a tutorial on Cuttin Corners vinyl on applying heat bond ultra to fabric to make it like htv.  I then made a shadow cutout in black vinyl to edge it.  My placement was a little off.  I'm going to need better lighting by my heat press.  But I do love the look.  Now to see how long it will actually last!

Be sure to check out Betsy at Cuttin Corners vinyl, or the folks at Expression vinyl for great tutorials and ideas for using vinyl.  

Thanks for stopping by!

Friday, February 26, 2016

My Cinderella Carriage


After making my more pumpkiny carriage, I thought it would be fun to make one that was more like the one in the Walt Disney's Cinderella movie.  This was the end result.  It was  given to my granddaughter.  I used glitter paper from DCWV Shimmer stack, and a mat size from Once upon a time, also from DCWV.  The little lanterns needed to have little rectangular pieces of gold glitter paper put inside so the white didn't show so much.  I glued pieces on the back and bottom.  I added the letter "C" to the door.  It's on the Cinderella coach, but could be for my granddaughters name too. It was the Forte font.  

From SVG Cuts Enchanted Autumn

My inspiration

I had to do some hunting for the crown sticky jewel on the lid.  I finally found some at Michaels.  The glitter paper does cause a challege when gluing.  It takes a little more time to adhere.  (I don't have much patience.)  In the end I was very pleased with my carriage, and I hope it's something my little princess will enjoy for years.

Cut Once and Craft for a Week.


With the addition of two grandchildren, my crafting time has been drastically reduced.  I get an hour here and there to put a small project together, but not the real craft time I desire.  In a effort to get more projects done, I decided to borrow an idea from some busy mom blogs.  "Cook once, eat all week."  So this week, I am cutting once to craft all week!

                                    
                                                         (previous years projects)

  The Bunny Hop kit by SVG Cuts from a few years ago, has one of my favorite projects for Easter.  I love the Bunny box!  I made all the grandkids one several years ago, but with new family members, everyone is getting a new bunny.  I have papers picked and I'm cutting out 8 bunnies to put together this week.  It's the setup process that takes me the longest.  Although this project is easy to pick paper for, cutting and weeding still take a while to do.  It seems I can be in my craftroom, unbothered, for several hours on Friday nights!  I have two more bunnies to cut out, so I shall get back to it!

Friday, October 9, 2015

Black Cat Paperscape Box Card by Dreaming Tree (3D Svgs)


Today, in very little time, I made this super spooky paperscape box card by Dreaming Tree.  This was really fun to put together.  I did make a couple of changes to fit my desire to showcase some nice 2 sided paper I have by making memories.  I used the 2 sided paper as both base and panels.  In other words, I didn't cut out the panel pieces.  I did cut the fence out though, because I wanted the contrast. This is going to look great on the mantel all lit up tonight!  I'll be putting the other two together either later tonight or tomorrow!  

If you are wanting an easy but mind blowing project be sure to check them out (Click here)

Cinderella

Back in the spring, when Cinderella first came out, I took my grandsons and a friend to see it.  I fell in love with that version of the movie.  I had planned to make the pumpkin coach by SVG Cuts, but never got around to it.  This week, I rented it at Redbox and watchd it with my granddaughter. (She's 2 1/2).  After we watched it a few times, I knew for sure I wanted to make the coach.  So I picked out my papers and got to cutting.


I have a pad of DCWV Once Upon a Time that I have been hoarding.  It was perfect for this!  I have since added a crown jewel sticker to the top that isn't shown here.  I hadn't bought them yet.  

This was remarkably easy to assemble.  But the finised project is so elegant and delightful!  I think I will be making a few more in different color schemes. 

If you want to try your hand at this project, just check out SVG Cuts, it's the Enchanted Autumn.

Friday, October 2, 2015

A Free SVG File You Don't Want to Miss!

Happy Friday!

I'm finally back in my craftroom with a free SVG file to share.  If you haven't seen the new Dreaming Tree website, then I highly encourage you to check it out.  Right now they have the cutest coffin SVG to download for FREE!  Yes!  FREE!  (update there is also a free Santa Paperscape Box card and Stingy Jack Lantern for a limited time)


Free Dreaming Tree SVG File Spooky Coffin
Did I mention Free?
I was able to make this coffin with one sheet of 12x12 cardstock and some scraps.  The base and lid were made from a Making Memories Toil & Trouble collection from 2010 that I have been hoarding.  It's a lovely 2 sided cardstock I bought from an online craft company that has since gone out of business.  The purple is scrap from some Halloween projects I made last year, and I always have black and yellow scraps!  I did a little inking around the edges.  This little guy is 3 1/2 inches tall and 2 inches wide at the biggest section.  It will be fun to fill for the grandkids!

If you are new to the world of 3D paper creating and don't know where to go for fun files that don't break the bank, then this is one site that can fill the bill.  Your friends and family will squeal with delight when they see what you can do with paper!

So head on over and check them out!  Just click here!

Friday, September 25, 2015

Dreaming Tree! Check them out!

I got an email today from a company called Dreaming Tree.  At first I hit the delete button, but as it was whisked away to my trash bin, I saw SVG in the preview line.  So I went searching for it again.  I was sad to read that this new company was due to the parting of my beloved SVG Cuts. SVG Cuts is still around, and Mary is still delivering wonderful projects, but what Leo is bringing to the world of 3D paper crafting is going to appeal to a whole new group of crafters! I am mad for the Christmas Paperscape Boxcards!  They look so cool and different!
Christmas Paperscape Boxcards

He also has a more manly vibe going with the Vegas and Halloween kits.  One of the bonuses is you can buy indivdual projects, or bundle them.

Be sure you check out his assembly tutorials on Youtube.  

I've been avoiding my craftroom for a few months, but I'm feeling crafty again.  Stay tuned!

Thursday, June 11, 2015

It's Been Awhile!

It has been awhile since I've posted.  It's been awhile since I was in my craft studio.  I'm really tardy in completing the prize for the 200 page likes give away, but I finally got all the 3D pieces put together.

Tea for You and Me by SVG Cuts

This is the first time I've made all the 3D projects in a single kit.  It was really fun to pick a paperstack collection and work only from that stack for the decorated papers.  I also kept a common theme on the solid color paper.  I hope the winner will like the choices!

I'm hoping to get into my studio and craft some more.  Since I didn't complete my 30 day challenge, so many events have kept me out of the craft room.  Hopefully, this has passed and I can get back to more crafting.  At least a few times a week!

Thanks for stopping by.  I want to put the General Store from Country Market SVG kit together soon.  Be sure to check in and see how I'm doing!

Saturday, April 11, 2015

Day 11 of my 30 Day Challenge

I spent day 11 watching a video tutorial and then designing a word mini album.  Below is a picture of my prototype.

I downloaded the free font Cafe Rojo for the letters.  Watched a video by Krafting Kelly.  She uses the Silhouette Studio software, but I found it to be very similar to ecal 2.  Then made my own cut files.  I cut each letter out two times using AC cardstock.  I tried to use some chipboard I have, but it was way to thick.  I then used my Cinch to punch the holes and put in the wire binding ring.  Now it's ready to be decorated with pictures, sentiments and pretty embellishments.  And, I have learned a new and very useful skill today!  Which is what I was hoping to do during my 30 day challenge!  

Thanks for stopping by and be sure to drop by again!

Thursday, April 9, 2015

Day 9 of my 30 day personal challenge

Day nine saw the successful completion of the teapot from SVG Cuts Tea for You and Me kit.  This was a great project to do.  I love how well it went together!  It looks so real and is so sturdy.  This teapot will be part of my Facebook 200 page likes give away.  I will be making the entire kit for the lucky winner!

 For the base I used AC cardstock.  For the panels I used DCWV's The Butterfly Garden stack.  It has a real English teapot feel to it.  I added some little sticky pearls on the lid and lid handle, and tied a ribbon to affix to the top.  It's going to be hard to let it go!

Once again, thank you for stopping by my blog.  Be sure to check in again for more crafting adventures!

Wednesday, April 8, 2015

Day 8 was a personal challenge!

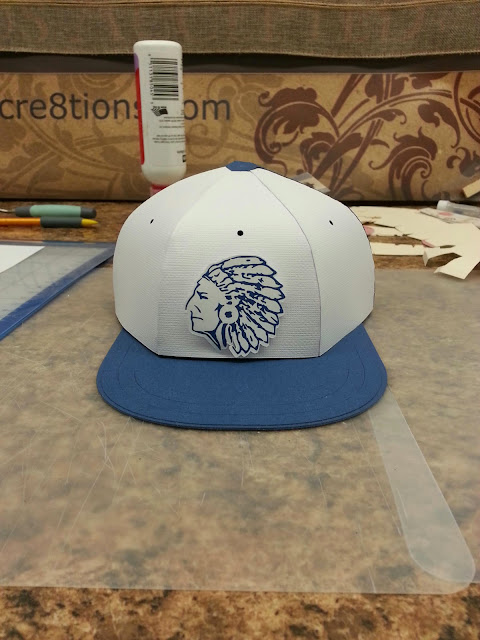
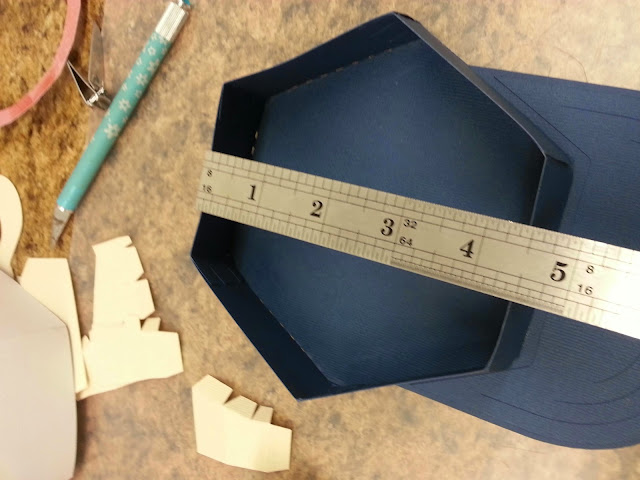
It has really been a challenge these last few days to get into my craft studio, but I have managed!  I have a teapot cut out and ready to assemble, but I got a request for a baseball cap for a high school prom.  Prom wins!  Here is what I put together.  It will carry the boutonniere for a prom date!  How exciting!  This is the baseball cap from Fun and Games by SVG Cuts.  I used AC Cardstock for the entire project.  I did a print2cut for the indian head logo from the school.

(Please excuse the mess)

If you haven't made the cap for yourself, it is very roomy.  


Thanks again for stopping by.  Be sure to check in tomorrow for the finished teapot!


Monday, April 6, 2015

30 Day Personal Challenge Day 6

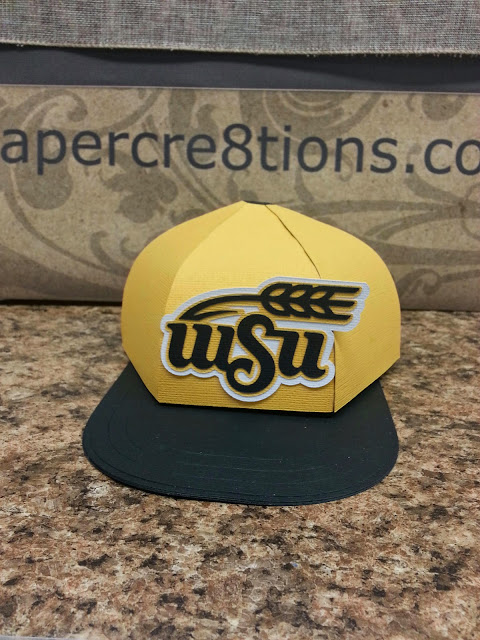
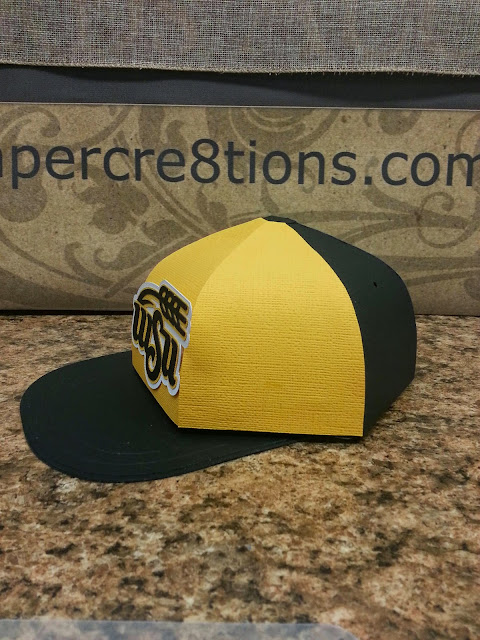
Well, today's project didn't turn out exactly as I had planned.  I'm a visual person.  So I don't alway get the end result I want, until I see what I have done wrong.  The baseball cap from Fun and Games by SVG Cuts, was going to be fashioned after the WSU Shocker mens baseball caps.  Gold on the front and black on the back and bill.  For some reason, I could only see (in my mind) that two front panels needed to be gold.  Nope, needed to be three. Oops.  I went ahead and cut a third gold panel and glued it on over the back.  I can't give this one away.  I'll have to keep it as a reminder that I need to cut three different panels.  It doesn't look terrible.  But it's not right.  I didn't measure the area for the logo very well either.  This one is a little too big!  So, today's crafting was a learning experience!


I used AC Cardstock for this entire project.  I also did an internet search for the team logo and did a trace into ecal2.  I did some tracing in the original ecal, but I like what ecal2 does, so much better.  I don't usually have to do much to the image to make it cutable!  

Thanks for stopping by and be sure to stop in again soon!


Sunday, April 5, 2015

30 Day Challenge, Day 5 Happy Easter!

Today's post are projects I actually made last night in anticipation of not having time to craft today.

I used my Sizzix eclips2 to cut vinyl for these two tumblers that are bithday gifts later this week.  Both vinyls are oracal 651 that I purchased off ebay two years ago.  I was afraid to use it until now!  After watching a few youtube videos on how to apply it I have been less hesitant.  I'm very pleased with the outcome of these tumblers.  I bought a case of double wall tumblers from Dollar Tree.  This case had the summer colors.  It has the red and blue you see and a really nice green and orange.  I found the images on the internet under free svg searches and then did a trace into ecal2.  I love the wrapper feature!  It curves the words and design so your cup looks more professional.


 I have found for transferring the design from the mat to the project is really easy with some Dollar Tree Clear Magic Cover.  It's clear shelf paper that has just the right amount of sticky to make the transfer and you can see what you're doing.  

Thanks for stopping by and be sure to check out my facebook page.  I will be having a spring theme give away because we got to 200 page likes!

Saturday, April 4, 2015

30 Day Challenge, Day 4

WARNING!  This one hits high on the cute scale!

This egg from the Poplar Street Tulips by SVG Cuts is a favorite.  It always looks so good when it's finished!


This egg turned out too darn adorable!  The base is pink AC Cardstock.  The top panels are by We R Memory Keepers, Cotton Tails.  I got several sheets at Hobby Lobby in a clearance pack. Love it!  The bottom panels are from First Edition Papers.  The collection is called Spring Drop.  I'm going to be looking for that stack again.  It is sooooo cute.  

This egg is a hostess gift.  I was hesitant at first about the pink makng a statement, but I really do love how it turned out!  I think it will be well recieved!  

Tomorrow I will have a post, but I made the project a day early.  Hope you don't mind!

Thanks for stopping by.  Be sure to visit my facebook page and give me a like!

Friday, April 3, 2015

30 Day Personal Challenge, Day 3

I'm really having fun spending evenings in my craft studio and thinking about what project to do next!  Last night I made the birdcage from Playful Parlour by SVG Cuts


I used AC Carstock for the entire project.  The pieces cut out beautifully on my Sizzix eclips2.  I think this will be something I actually keep on a shelf in my livingroom.  

My next project will have to be Easter related.  I want to make a hostess gift for a egg hunt party that a family member is having.  I will also have a post on Easter Sunday, but it will actually be a project I make today or tomorrw.  I'm hosting Easter dinner and doubt that crafting will be something I can do til very late on Sunday.  

I'm just 3 page likes away from reaching 200 on Facebook!  I'll be having a spring theme give away when that magic number is achieved!  

Thursday, April 2, 2015

Day 2 of 30 Day Challenge

It is day 2 and I do have another project to share.  Today it's from the SVG Cuts Box Cards file.


To make this card I used one full sheet of white AC Cardstock and the the rest of the single colored paper was from scraps.  The fun flower paper that is on the inside flaps is from First Edition Paper.  The pad is called Spring Drop.  It is full of bright happy cardstock!  I used two different embossing folders for the outside panels.  

Making this card was a double challenge for me.  I don't really care for "fussy" projects that force me to make a lot of decisions about what papers to use.  I buy the majority of my paper in 12x12 format, so when I have to cut an entire sheet for a small project, it causes me great grief.  I thought I would branch out and buy some 6x6 pads for box cards, but the pads I got didn't fit this card.  However, I did find this card to be delightful and fun.  I'll make another box card before the month is over!

Still trying to get to 200 facebook likes for a spring theme give away.  Will you help?

Thanks for stopping by and be sure to check in again tomorrow!


Wednesday, April 1, 2015

Day 1 of the 30 Day Personal Challenge!

For my first day of the 30 day personal challenge I have completed the beer mug from the Feeling Lucky kit by SVG Cuts.

Feeling Lucky by SVG Cuts

This was suprisingly easy and very fast to put together!  Another one for my favorites list!  

To put this together I used AC Cardstock for the base and The Guy Stack by DCWV for the panels.  I embossed the white panels with a Cricut Cuddlebug folder I've had for a long time.  (I will be on the lookout for a more sudsy one though!)  This is a great example of how versitile the kits are at SVG Cuts.  

As I continue my challenge, I will use it as an opportunity to stockpile some gifts and cards that I will need in the very near future.  I'm terrible about starting on projects at the very last minute, or not getting them started at all.  I hope this challenge will help me do a better job of planning and executing!  

While you're here, be sure to stop by my Facebook page and give it a like!  When I get 200 page likes, I'll have a spring theme give away!

Thanks for stopping by.  Be sure to stop by often (or daily) and see what else I have going on in the craft studio!
Older Posts Home

Have You Been Missing Out?

Below are the fun giveaways that have be going out the last few weeks.  Only 2 more Wednesdays until Christmas!  That means only 2 more give...