Showing posts with label eclips. Show all posts

Wednesday, July 7, 2024

New Giveaway Winners and Life


Be sure to visit our Facebook page

First let me congratulate the winners for this weeks giveaway!  The two lucky winners will receive ICT potholders!  All they had to do was comment and share the giveaway post!  How easy is that!  Be sure to visit Crafting On A Budget's facebook page often for your chance to win.  Why not just follow and sign up for notification?

I have declared July as Craft Your Stash month and with that, I decided I would dig out some crafting equipment I have purchased in the past to utilize, instead of looking for new things to buy.  One of those items is the Provocraft Your Story laminating and book binding machine.  I bought it, but I have never "fired" it up.  One reason was the binders that went with it were very expensive.  And if I'm being honest, I was a little intimidated by it.  I was hoping to get it out this weekend and make something with it.  But life got in the way.  It was a holiday weekend and getting ready to celebrate with family took up the time I was hoping to have for crafting.  But it is still the next thing on my list to do.  I suppose if I had an actual project in mind, I would feel more excitement and urgency.  So today, I'll troll the internet and youtube to see if I can find some inspiration, and then I'll share that with you.

So, stayed tuned for some project on the Your Story and be sure to check the facebook page for the next giveaway!

Remember, Crafting on a budget means making beautiful things affordably!

Thursday, July 1, 2024

Making A Plan For A Make-it Christmas


 2020 was something else.  As the pandemic raged on, I decided to make most of the gifts I was going to give for Christmas.  It was a well recieved idea.  I did some sewing, and some 3D printing, and I was able to give some thougtful, handmade gifts.  I started printing the 3D projects in September, because I knew they would take a long time to make.  I printed lithophane lightboxes for all the younger grandkids, and a couple for some adults.  I also sewed the younger grandkids a set of pajamas, or a gown. 

 This year,  I want to continue what I hope will become a yearly tradition, and again have a Make-it Christmas.  So, now is the time to start planning what a Make-it Christmas will look like.  My first step is to take inventory of all that I have and utilize as much of it as I can.  This is also a good time to stock up on items that aren't in high demand, like flannel and fleece.  For 3D printing, knowing how much filament you might need for your projects could save you time and money now.  Starting in October, the demand for lithophanes will become very high, and good quality, white filament will be hard to source.  


A lot of paper crafters start making their Christmas cards now and several of the more popular SVG sites will put out a bundle for them.  As of this writing, there are 177 days until Christmas.  That's 25 weeks or 6 months.  For those of us who are chronic procrastinators, this seems like an eternity.  But, as one who usually falls short on a dozen different projects I was going to get done for Christmas, that isn't enough time!  

What's my plan?  I'm going to make out my gift list, (get the link here) and start planning what I want to give to each person.  Then I'm going to plan to make one gift each week for the next 25 weeks.  That should give me plenty of time to find all the supplies I already purchased, but don't remember where I put them.  I might even have time to actually make a few cards this year!  Wish me luck!  I'll make a blog post each time I complete a Christmas gift. (but I won't be able to post picture)  Hopefully, this won't be the last post!  🤣

Let's Make July Craft Your Stash Month!


 I have a bad habit.  I like to hoard craft supplies.  I also like collecting craft tools, like die cutting machines, and embossers and laminators.  Not to mention printers.  I have regular color printers, sublimation printers, DTF printers, and 3D printers.  And of course all the supplies that go with them.  I can bind books with a glue spine or with a ring binder.   I have too much stuff.  But I need every single thing I have.  When the new mug press came out, it was another thing I really thought I needed to have to make great gifts and to sell as a side hustle.  I opted to get a regular mug press that would press 4 different sizes of mugs.  I did make a few great gifts with it.   As I was cleaning and organizing my craftroom a few weeks ago, I decided to start using what I already had, instead of going out a purchasing more.   At least until I had run out of something, I wouldn't buy more of it.  I also made a personal commitment to do something in my craftroom every day.  So far I have only missed one or two days since making that personal pledge.  It has encouraged me to learn more about designing things in Tinkercad and Photoshop.  I have printed and mailed out stickers for my grandkids.  I have 3D printed toys on demand for a grandkid.  By engaging in all these activities, it helps me be more creative.  I see new projects that I can complete.  So I decided that I will make July a Craft Your Stash Month.  No new purchases.  I can only use what I already have.  During this month I am even going to get out and use the Provocraft YourStory that I have never, ever used!  (I hope it works)


So follow along as I journey into the world of forgotten craft supplies and see if you can draw inspiration to Craft Your Stash this month.

First episode Provocraft YourStory, Monday July 5.

Tuesday, May 11, 2024

Spring Is Here


These lovely birdhouses are just a couple of the many 3d svg designs you'll find at Dreaming Tree.  With a few fun touches, like little birds and moss from the Dollar Tree and even a few of the silk flowers they have, you can have a beautiful gift for a friend or neighbor, or put a touch of sping in your home decor.


Thursday, August 17, 2017

Eclipse crazy!

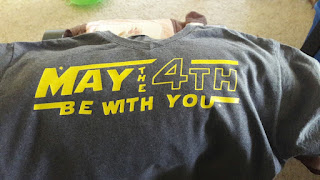
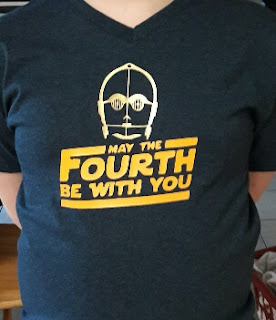
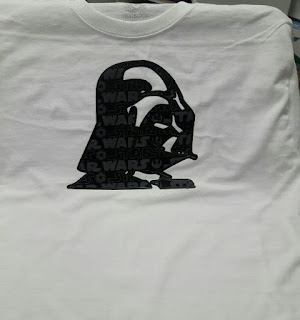
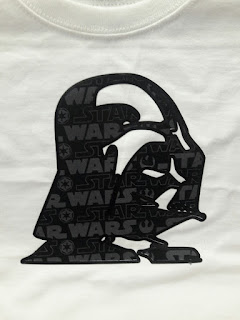
 I've been gearing up for a trip north to be part of the 2017 Solar Eclipse.  We're going to a town that will experience totality.   We have our glasses for viewing and I just had to make the grandkids some shirts!  I had a lot of fun designing them.   The older boys wanted the Star Wars themed shirts.
 These were made with a yellow metallic and black htv.
 
 This little shirt was made with black and glow in the dark htv.
This shirt was made using vinyl adhedive and deco foil. 
And finally we have glitter htv and glow in the dark .  

This was a fun and fairly quick project using my Sizzix eclips 2 and my 15x15 heat press.   


Wednesday, May 3, 2017

Teacher Appreciation 2017

Can you believe it?   It's already May!   Are you scrambling for a last minute teacher appreciation gift?  I got the Oracal 651 out and sat down with ecal 2 and made this design for some of the teachers in our life.  I admit,  I had some trouble and had to remove,  re-cut and then reapply my design on a couple of these,  but FINALLY I got the look I was shooting for.
I finished them with some paper and foil shred.  If you make some using the Dollar Tree tumblers, be sure to include a note to handwash only.   Have fun creating!

Wednesday, April 26, 2017

Crazy about HTV!

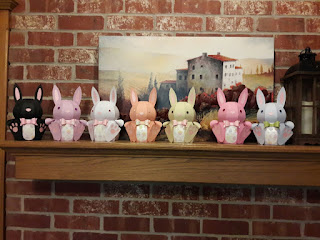
I've been very busy with little people this last year and a half.  But now that they are getting older and can entertain themselves for little bits of time, I find more crafting time.  I completed bunnies for Easter that I cut out last year but didn't have time to put together.  I was even able to cut a couple more for new babies.

This has been a very busy file for me.  I think I can safely say I've made more that 50 of these cute little guys!

But more recently, I've been hearing the call of vinyl.  It is a medium I have really wanted to learn more about.  I had ordered some heat transfer vinyl a couple of months ago, but didn't have the courage to try it.  I then decided I needed a heat press and so I bought myself a 15 x 15 clamshell from eBay.  Man, does it make this vinyl more fun to do!  I've tried my hands at a couple of projects, both with HTV and adhesive.  I've used the adhesive before, but with some improvements on the ecal 2 software, I think my projects are looking even better.  Here are the ones I've done over this last week.
 This was my first htv project.  I cut the vinyl too deep and had to piece it all together on the shirt.  Not really the result I wanted, but a lesson learned.
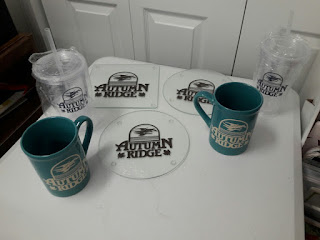
 I bought a bunch of these glass cutting boards/trivets at the Dollar Tree over a year ago, with the intent to etch or put vinyl on them for gifts.  I finally got a couple done along with my Dollar Tree tumblers and yes, these are Dollar Tree mugs.  I'll give these away in a drawing for our neighborhood work day this Saturday.


I tried my hand again at a different style Star Wars day shirt.  I had better results, by not cutting all the way thru the htv.  I think I need to work on sizing now.
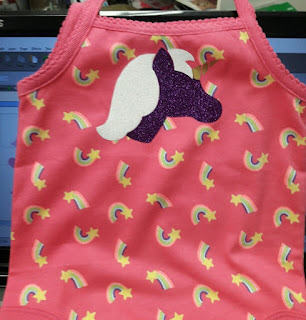
Now when I go to Wal-Mart, I'm on the look out for cheap apparel to add htv too.  I thought a unicorn was just what this little summer romper needed.  I'm getting better!

My last project today was inspired by some clearance fabric I found at Wal-mart.  I watched a tutorial on Cuttin Corners vinyl on applying heat bond ultra to fabric to make it like htv.  I then made a shadow cutout in black vinyl to edge it.  My placement was a little off.  I'm going to need better lighting by my heat press.  But I do love the look.  Now to see how long it will actually last!

Be sure to check out Betsy at Cuttin Corners vinyl, or the folks at Expression vinyl for great tutorials and ideas for using vinyl.  

Thanks for stopping by!

Friday, February 26, 2016

My Cinderella Carriage


After making my more pumpkiny carriage, I thought it would be fun to make one that was more like the one in the Walt Disney's Cinderella movie.  This was the end result.  It was  given to my granddaughter.  I used glitter paper from DCWV Shimmer stack, and a mat size from Once upon a time, also from DCWV.  The little lanterns needed to have little rectangular pieces of gold glitter paper put inside so the white didn't show so much.  I glued pieces on the back and bottom.  I added the letter "C" to the door.  It's on the Cinderella coach, but could be for my granddaughters name too. It was the Forte font.  

From SVG Cuts Enchanted Autumn

My inspiration

I had to do some hunting for the crown sticky jewel on the lid.  I finally found some at Michaels.  The glitter paper does cause a challege when gluing.  It takes a little more time to adhere.  (I don't have much patience.)  In the end I was very pleased with my carriage, and I hope it's something my little princess will enjoy for years.

Cut Once and Craft for a Week.


With the addition of two grandchildren, my crafting time has been drastically reduced.  I get an hour here and there to put a small project together, but not the real craft time I desire.  In a effort to get more projects done, I decided to borrow an idea from some busy mom blogs.  "Cook once, eat all week."  So this week, I am cutting once to craft all week!

                                    
                                                         (previous years projects)

  The Bunny Hop kit by SVG Cuts from a few years ago, has one of my favorite projects for Easter.  I love the Bunny box!  I made all the grandkids one several years ago, but with new family members, everyone is getting a new bunny.  I have papers picked and I'm cutting out 8 bunnies to put together this week.  It's the setup process that takes me the longest.  Although this project is easy to pick paper for, cutting and weeding still take a while to do.  It seems I can be in my craftroom, unbothered, for several hours on Friday nights!  I have two more bunnies to cut out, so I shall get back to it!

Tuesday, February 23, 2016

Free SVG Files!

Have you been to the Dreaming Tree website yet?  If not, get over there fast!  They have several totally free svg files to download.  And right now, they will give you a gift card worth $2.99 to their website, just for making one of the free SVG files!  How crazy is that?!?!  But that's not all....if they get to 15,000 facebook likes before the promo ends, they will have a cutting machine give away.  To enter, you just have to make the free file and enter to receive the gift card!  So, here is the link to get the free file (Click here).  And here is the link to enter once you make the Clover Treat basket (Click here).  Be sure to go to their facebook page and give them a like!  The sooner they get to 15,000, the closer we'll all be to winning ! 


Friday, October 9, 2015

Black Cat Paperscape Box Card by Dreaming Tree (3D Svgs)


Today, in very little time, I made this super spooky paperscape box card by Dreaming Tree.  This was really fun to put together.  I did make a couple of changes to fit my desire to showcase some nice 2 sided paper I have by making memories.  I used the 2 sided paper as both base and panels.  In other words, I didn't cut out the panel pieces.  I did cut the fence out though, because I wanted the contrast. This is going to look great on the mantel all lit up tonight!  I'll be putting the other two together either later tonight or tomorrow!  

If you are wanting an easy but mind blowing project be sure to check them out (Click here)

Friday, October 2, 2015

Facebook Give Away!


This fun Stingy Jack Lantern 3 from Dreaming Tree is my Halloween give away.  Head over to my facebook page (click here) and leave a comment on the post to be eligible.  Winner will be announced on October 15, 2015.

A Free SVG File You Don't Want to Miss!

Happy Friday!

I'm finally back in my craftroom with a free SVG file to share.  If you haven't seen the new Dreaming Tree website, then I highly encourage you to check it out.  Right now they have the cutest coffin SVG to download for FREE!  Yes!  FREE!  (update there is also a free Santa Paperscape Box card and Stingy Jack Lantern for a limited time)


Free Dreaming Tree SVG File Spooky Coffin
Did I mention Free?
I was able to make this coffin with one sheet of 12x12 cardstock and some scraps.  The base and lid were made from a Making Memories Toil & Trouble collection from 2010 that I have been hoarding.  It's a lovely 2 sided cardstock I bought from an online craft company that has since gone out of business.  The purple is scrap from some Halloween projects I made last year, and I always have black and yellow scraps!  I did a little inking around the edges.  This little guy is 3 1/2 inches tall and 2 inches wide at the biggest section.  It will be fun to fill for the grandkids!

If you are new to the world of 3D paper creating and don't know where to go for fun files that don't break the bank, then this is one site that can fill the bill.  Your friends and family will squeal with delight when they see what you can do with paper!

So head on over and check them out!  Just click here!

Friday, September 25, 2015

Dreaming Tree! Check them out!

I got an email today from a company called Dreaming Tree.  At first I hit the delete button, but as it was whisked away to my trash bin, I saw SVG in the preview line.  So I went searching for it again.  I was sad to read that this new company was due to the parting of my beloved SVG Cuts. SVG Cuts is still around, and Mary is still delivering wonderful projects, but what Leo is bringing to the world of 3D paper crafting is going to appeal to a whole new group of crafters! I am mad for the Christmas Paperscape Boxcards!  They look so cool and different!
Christmas Paperscape Boxcards

He also has a more manly vibe going with the Vegas and Halloween kits.  One of the bonuses is you can buy indivdual projects, or bundle them.

Be sure you check out his assembly tutorials on Youtube.  

I've been avoiding my craftroom for a few months, but I'm feeling crafty again.  Stay tuned!

Wednesday, July 8, 2015

New Give Away on Papercre8tions Facebook page!

Good Morning!  It's time to set a new facebook goal and have a give away!  I've been sitting at 213 for some time now.  I would like to see that number grow to 250.  When we get to 250, I will have a give away!  I'm thinking the lighthouse, but I haven't made a definite decision on that.

SVG Cuts Seaside Kit

Whatever the give away, I know you will love it!

So, be sure to visit my facebook page and give it a like!  The sooner we hit 250, the sooner we can have a winner!


Friday, June 12, 2015

Sunday is Flag Day!

June 14th is Sunday and that is Flag day.  That means you can get out all of your patriotic decor and enjoy it for almost a month!  

I feel inspired to make the lighthouse from SVG Cuts.  I think that will be my project this weekend.  I have the Graphic 45 paper By the Sea, so I should put it to good use.
Seaside by SVG Cuts

It will be nice to get back to crafting on a more consistant schedule again!

Have a great weekend!

Thursday, June 11, 2015

It's Been Awhile!

It has been awhile since I've posted.  It's been awhile since I was in my craft studio.  I'm really tardy in completing the prize for the 200 page likes give away, but I finally got all the 3D pieces put together.

Tea for You and Me by SVG Cuts

This is the first time I've made all the 3D projects in a single kit.  It was really fun to pick a paperstack collection and work only from that stack for the decorated papers.  I also kept a common theme on the solid color paper.  I hope the winner will like the choices!

I'm hoping to get into my studio and craft some more.  Since I didn't complete my 30 day challenge, so many events have kept me out of the craft room.  Hopefully, this has passed and I can get back to more crafting.  At least a few times a week!

Thanks for stopping by.  I want to put the General Store from Country Market SVG kit together soon.  Be sure to check in and see how I'm doing!

Tuesday, April 14, 2015

Day 14 of 30 day challenge.

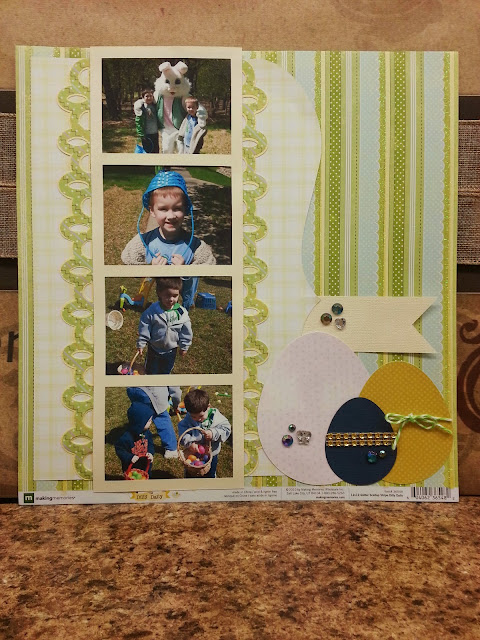
For day 14 I wanted to do something I have never done before.  A scrapbook page!  I found an easy layout at SVG Cuts, in the Poplar Street Tulips collection.  My pictures were going the wrong direction, so I turned things around to make it work for me.  I like it!  It was easy and quick to do!  The larger pattern paper was from making memories called dilly daly.  I got it on clearance a few years ago and I'm trying to use it up.  The rest was scraps or AC cardstock.  Had it all complete in under an hour.  I may just do some more in the future! 

Days 12, and 13 of my 30 day challenge.

Sorry!  I'm running behind on my blog posts.  But I have been in my craft room creating!  I'm a little hooked on these word albums.  There are so many possibilities!  Personal names, sports, teams, cities, events!  What a lot of fun.  The first two I did were at the requests of others.  I did the grandma album first, then had a request for a name.  The name album came out so adorable.  I used papers from DCWV Nina's kids and Kidlet collections.  Then I wanted to do one for myself and actually add embellishments.  So I picked my granddaughter Cora and made my own album.
This was requested

This one I did for myself!
So much fun to add pictures and stickers!

I have seen some really tricked out albums on Pinterest and google.  I'm not that creative!  A simple word with adorable paper and a few stickers and I'll call it good!  

Both of these were made by cutting each page two times.  One cut facing correctly and the other a mirror image.  I then glued the two pages together.  That takes skill! Lining up the edges before the clue dries is a little tricky! I used a plastic scraper I keep on my craft counter to spread the sheets together as flat as I can.  Otherwise you can kind of see the glue stripes.  I also put a paper towel over the letters while I did my flattening, so I didn't damage the letters.  

I have a few crafting tools that I don't get out very often.  The Cinch is one.  I can see myselft using it more often now that I have the hang of making word albums.  

You could make some really cute holiday gifts too.  I can see them being used as recipes books, using the word recipes or cookies, or breads, and then having a different recipe on each page.  Or using numbers to create cute little year books highlighting some very important moments.  The possibilities are truly endless!

Thanks again for stopping by!

Saturday, April 11, 2015

Day 11 of my 30 Day Challenge

I spent day 11 watching a video tutorial and then designing a word mini album.  Below is a picture of my prototype.

I downloaded the free font Cafe Rojo for the letters.  Watched a video by Krafting Kelly.  She uses the Silhouette Studio software, but I found it to be very similar to ecal 2.  Then made my own cut files.  I cut each letter out two times using AC cardstock.  I tried to use some chipboard I have, but it was way to thick.  I then used my Cinch to punch the holes and put in the wire binding ring.  Now it's ready to be decorated with pictures, sentiments and pretty embellishments.  And, I have learned a new and very useful skill today!  Which is what I was hoping to do during my 30 day challenge!  

Thanks for stopping by and be sure to drop by again!

Older Posts Home

Have You Been Missing Out?

Below are the fun giveaways that have be going out the last few weeks.  Only 2 more Wednesdays until Christmas!  That means only 2 more give...