Showing posts with label heat transfer vinyl. Show all posts

Thursday, July 15, 2024

Let's Talk About Temp, Time and Pressure. How To Heat Apply DTF.

With every new thing, comes new challenges.  DTF is my new thing.  Finding information on how to heat apply was a toss-up for awhile.  Here is what I found online.  Your results may vary depending on your heat press.  

Do a pre-press on the garment you are apply the DTF transfer too.  Heat apply the transfer at 325° on medium to firm pressure for 10 seconds.  No cover sheet is required.


However, if you find that your transfer becomes dull after using this method, then try doing these things,

Lower the heat to 275° and press for 6 seconds on medium to firm pressure.  Allow the transfer to cool for a few seconds before trying to remove the carrier.  If the corner starts to lift, let it cool for a few more seconds.  

I was using too much heat and leaving the print under the heat for too long.  This is a by-product of sublimation, where the temps and times are very high and long.  Think of DTF being more like vinyl.  It is sometimes recommended to do a second press.  I have been doing the second press, but I do use a cover sheet whether it's teflon or butcher paper.  

Do you have a DTF tip to share?  Leave it in the comments!  Maybe you have a question.  Be sure to ask. 

Thursday, July 1, 2024

DTF vs. HTV Which is right for you?

If you are an avid crafter or a shirt decorator, you have probably stumbled across a post or video about DTF printing. 

What is DTF printing?  DTGPro explains it like this..."DTF is also referred to as Direct Transfer Film, and it works by printing transfers that are heat pressed to a variety of garments (and other substrates). There are many compatible fabrics including cotton, nylon, leather, polyester, and 50/50 blends. This is unlike DTG technology which only works on cotton fabrics. This therefore means that this printer works on a much wider substrate, making it the most versatile digital printer in the market. DTF printers work on both white and dark garments and can get the job done without requiring you to press on costly A+B paper, as is the case with the white toner printers.

Direct Transfer Film printers also combine reliability, unmatched quality and high productivity. They can handle large production volumes, which is essential in this fast-growing industry. Unlike DTG technology, DTF printers are preferred by most people because they are affordable and require no pre-treatment. For quality results, you will need DTF powder and DTF sheets to print transfer film, and of course, DTF Ink.

Another advantage of DTF printing over traditional printing is that it is highly sustainable. There is no question that the fashion industry is increasingly focusing on sustainability."

But...Is DTF right for you?  Let's take a look at what it takes to get into DTF printing.
Supplies
  • Printer that has been or can be converted for DTF printing.  (list of printers)
  • Rip software for printing.  (for more info, google rip software)
  • DTF Ink
  • Refillable ink cartridges and syringes
  • PET film to print on
  • Adhesive powder 
  • Heat source to cure adhesive powder
  • Heatpress to press finished transfer onto garment.
To help you understand the cost, I'm going to share what I paid, which is the very low end of the cost to start DTF printing.
*Printer...I purchased an Epson Artisan 1430 on ebay for $193.50 with shipping.
*RIP software....I purchased AcroRIP 9.  It's an older version, but newer printers will need the newer version of AcroRIP 10.  I paid $99.  You can purchase it for $85 from McLaud Technology. (And the computer to load the software onto, which I am assuming you already have)
*DTF inks, film and powder....I purchased the starter bundle from DTFsuperstore for $225 with shipping.
*Refillable cartridges for the DTF ink...I purchased 2 sets of 6 from ebay for $47.90.  I also bought 6 syringes with long needles from Amazon for $6.99
*Heat source for curing...I tried the hover method on my heatpress, but it didn't work for me.  My heatpress is cheap and has cold spots.  I spent $21.25 at Walmart.com for a Wagner Furno 300 Heat Tool.  It has worked very nicely.
*Heatpress...I have had my heatpress for several years.  I bought it on ebay for about $180 I think.  New ones are selling for around that price now.  The smallest you really want to go is 15x15.
So...for the grand total of $773.64($593.64 if you already have a heatpress), I have a printer and the needed software and supplies to print full color DTF transfers.  No matter the size, the color or the quanity, I have what I need.  No weeding and no additional inventory. However, keep in mind, I went the cheapest route I could.  Your costs may be higher based on availablity of products due to increasing demand.
What are the drawbacks?   Well, the Artisan 1430 is very big.  Any printer you find that will print large format is going to be big.  You are taking a chance when you convert that it's not going to work.  My printer is older and used.  Who knows how long it will last.  Once you introduce non-oem ink into the printer, you void the warranty.  There are modification that need to be made to the printer to avoid "pizza cutter" lines through your prints.  Once you convert to DTF, there may be no going back to regular printing.
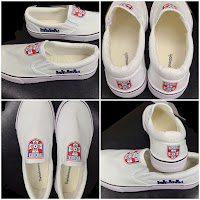
What are the positives?  Well, as I mentioned above, no additional inventory, like heat transfer vinyl.  There is no substate limitation.  What does that mean?  You can press it on practically any material.  Cotton?  Yes.  Canvas?  Yes.  Polyester?  Yes.  Blends?  Yes.  Did I mention no weeding?!?!  Which allows for some very small designs!  Check out these shoes I did!
Shop With Me

The emblem on the back of the shoe is 1.5" tall and very detailed.  Imagine trying to layer that?  I know it can be done, but the time it takes to weed and layer has just been cut down by at least 75%.  
Finally, durability.  I have done a few practice shirts, that I continue to toss into the washer and dryer with each new load.  After at least 10 full cycles, I have not seen any deterioration of the transfers so far.  I have not been turning the shirts inside out as recommended and I am putting them in the dryer on low heat, which is my normal.  Hang drying is suggested.

So, what is the conclusion?  Well, you'll have to decide for yourself if DTF is the future for you.  Maybe you would like to try it out before you go all in!  If that's the case, contact me for a great deal on a DTF transfer to try!  


Wednesday, October 4, 2017

October Update!
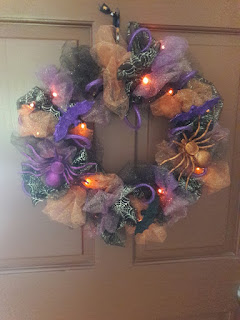
Although I've been quiet on here, I have been pretty busy with a few projects.  They range from birthday t-shirts, to Halloween wreaths!  I thought I would take a few minutes to share them with you.

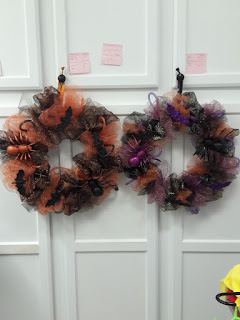
Made using the Crafters Corner sparkle tulle from Dollar Tree along with bats and spiders.  Lights were from my stash purchased 3 years ago at Hobby Lobby.

 Made with Dollar Tree sparkle tulle, bats spiders and led lights.

 I spent a day running around to several Dollar Tree stores in my area looking for the sparkle tulle, and the metal wreath rings to make these.  After watching a YouTube tutorial and seeing how easy it was, I wanted to make one for myself.  It's the top picture.  I then made one for my daughter and a son.  I was able to make these for a cost of about $10 each.  And they all have led lights.  It was fun, but very messy.  I have glitter everywhere.  The video is from 2016, and I didn't find the Halloween mesh, so I used the tulle.  I still love the way it turned out.

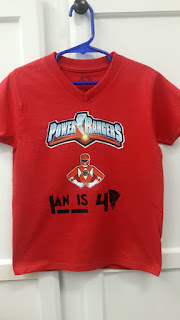
 Made using 3G jet-Opaque for the logo and Red Ranger, and black htv vinyl for the name.
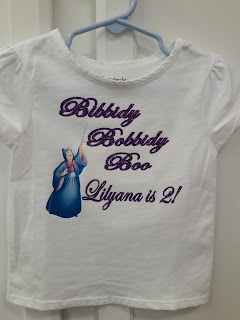
Made using the 3G Jet-Opaque for the Godmother and glitter htv for the saying.

I have also been designing and making t-shirts for birthdays.  I made one for my grandson's #2, (not pictured) and one for the son of a friend.  The "Cinderella" themed shirt is for my granddaughter.  I will also be making the svgcuts pumpkin carriage for a center piece.  I have made additional shirts for the grand kids, but I don't always think to take a picture before they are "worn away"!

In the mean time my massive paper collection is sitting idle wondering when I will start using it again, while my heat transfer vinyl collection is growing.  But I have my papers picked for the coach and I'll be cutting and gluing it this weekend. 

Thanks for stopping by!


Wednesday, April 26, 2017

Crazy about HTV!
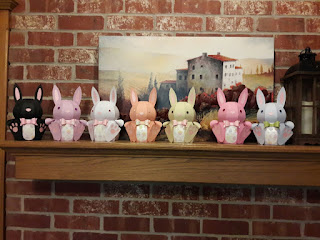
I've been very busy with little people this last year and a half.  But now that they are getting older and can entertain themselves for little bits of time, I find more crafting time.  I completed bunnies for Easter that I cut out last year but didn't have time to put together.  I was even able to cut a couple more for new babies.

This has been a very busy file for me.  I think I can safely say I've made more that 50 of these cute little guys!

But more recently, I've been hearing the call of vinyl.  It is a medium I have really wanted to learn more about.  I had ordered some heat transfer vinyl a couple of months ago, but didn't have the courage to try it.  I then decided I needed a heat press and so I bought myself a 15 x 15 clamshell from eBay.  Man, does it make this vinyl more fun to do!  I've tried my hands at a couple of projects, both with HTV and adhesive.  I've used the adhesive before, but with some improvements on the ecal 2 software, I think my projects are looking even better.  Here are the ones I've done over this last week.
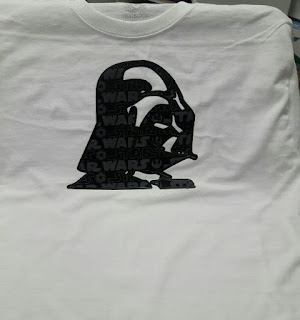
 This was my first htv project.  I cut the vinyl too deep and had to piece it all together on the shirt.  Not really the result I wanted, but a lesson learned.
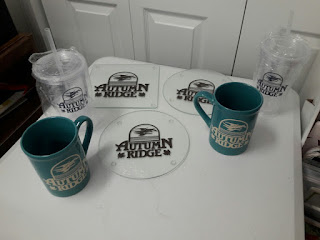
 I bought a bunch of these glass cutting boards/trivets at the Dollar Tree over a year ago, with the intent to etch or put vinyl on them for gifts.  I finally got a couple done along with my Dollar Tree tumblers and yes, these are Dollar Tree mugs.  I'll give these away in a drawing for our neighborhood work day this Saturday.


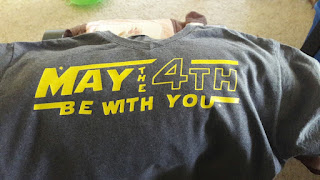
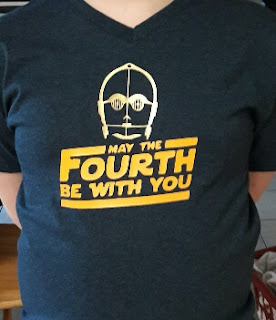
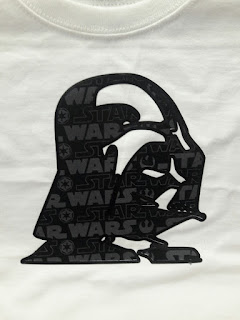
I tried my hand again at a different style Star Wars day shirt.  I had better results, by not cutting all the way thru the htv.  I think I need to work on sizing now.
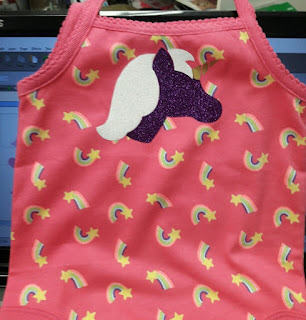
Now when I go to Wal-Mart, I'm on the look out for cheap apparel to add htv too.  I thought a unicorn was just what this little summer romper needed.  I'm getting better!

My last project today was inspired by some clearance fabric I found at Wal-mart.  I watched a tutorial on Cuttin Corners vinyl on applying heat bond ultra to fabric to make it like htv.  I then made a shadow cutout in black vinyl to edge it.  My placement was a little off.  I'm going to need better lighting by my heat press.  But I do love the look.  Now to see how long it will actually last!

Be sure to check out Betsy at Cuttin Corners vinyl, or the folks at Expression vinyl for great tutorials and ideas for using vinyl.  

Thanks for stopping by!
Older Posts Home

Have You Been Missing Out?

Below are the fun giveaways that have be going out the last few weeks.  Only 2 more Wednesdays until Christmas!  That means only 2 more give...